
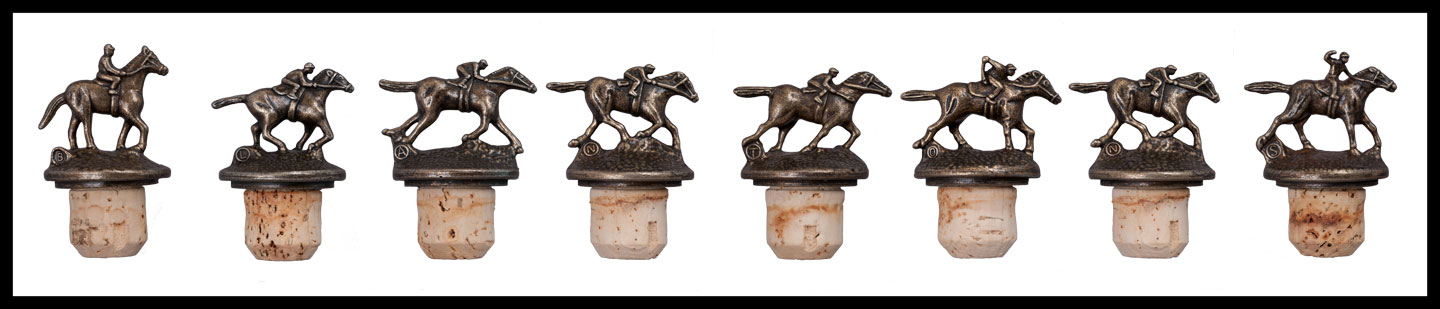
Muybridge: “The Horse in Motion” with Blanton’s Bourbon Bottle Stoppers (click to enlarge)
Here is the composite image containing all eight letters of Blanton’s bourbon bottle stoppers. Now you can see the resemblance to the Muybridge image. The original of the image above is 100 inches wide by 18 inches tall (it was reduced greatly so that it would upload and display faster). I have some friends who are big fans of Blanton’s. I intend to customize this image and have them hang it in their party shed.
This was a good snowy day project that required some nice lighting problem solving and intermediate Photoshop skills.
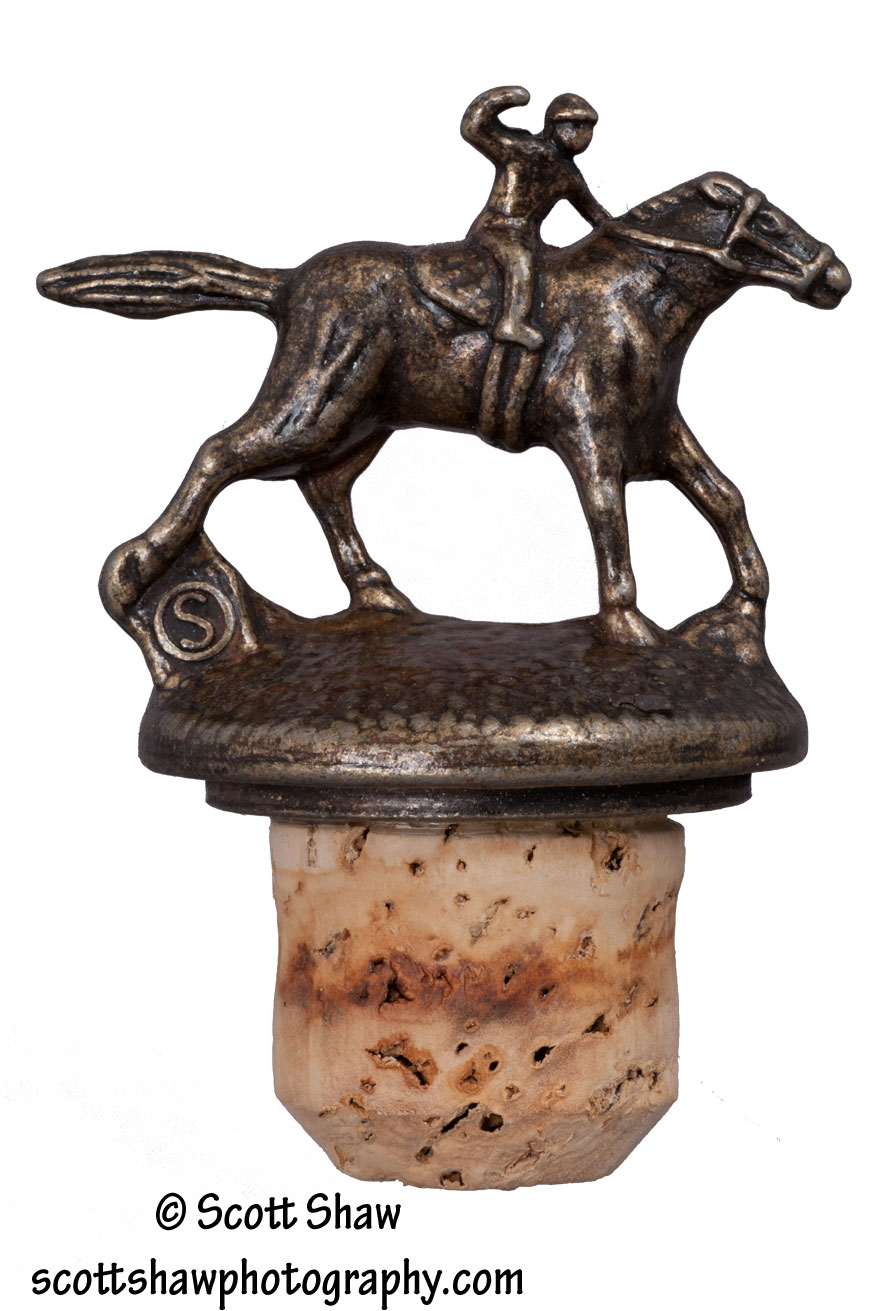
Blanton’s Bourbon Letter S Stopper (click to enlarge)
Here is the letter “S” Blanton’s bourbon bottle stopper after being cut out of the original image. In Photoshop, the image has a transparent background. When I saved the image in jpg format for upload to the website, Photoshop put in a white background. Note that the jockey’s head, the front edge of the statue, and the cork are all sharply focused as discussed in the previous post.
After creating images of each lettered bottle stopper, it was an easy matter to select the stopper and copy it into the master image that contains all eight images. Note that “Blanton’s” contains two “N”s. While I do have two letter “N” stoppers to form the complete set, I only shot one and copied it in both places (the horse pose is the same). Think anyone will notice?
UPDATE: Well, TWO people did notice that there are actually two different poses for the N bottle stopper. I gurss it is time to head back to the ABC store! (The ABC store is where us Virginia folks get our hard liquor.)

Three Nearly Identical Blanton’s Stopper Images (click to enlarge)
The first problem I ran into was consistency between images. I started with my camera set to Auto White Balance. This created slight differences in light color between images. To achieve color consistency between images, I used my X-Rite ColorChecker Passport in a test image. I then used Lightroom to determine the White Balance setting of my lighting set up, which turned out to be 3200K. I set the manual white balance on my camera to 3200K and, viola, consistent white balance between images.
With the front of my lens less than one foot from the stoppers, depth of field became the next issue requiring attention. If I focused on the jockey’s head, the focus on the front edge of the stopper and the cork would appear soft. So no matter which of those three points I focused on, the other two appear soft.
To address the depth-of-field issue, I took three images of each stopper. Using manual focus, the first image focused on the jockey’s head. The second image focused on the front edge of the stopper. The final image focused on the front of the cork. Click on the image above to enlarge it and look at the three focus points and then look at the other two points to see this softness. It is not much, but it does make a difference.
Once I made the three images I brought them all into Photoshop and used the stacked focus feature to create a single image with all three areas sharp.
