
Nikon D810, 5.0 sec, f/20, 90m, ISO 200
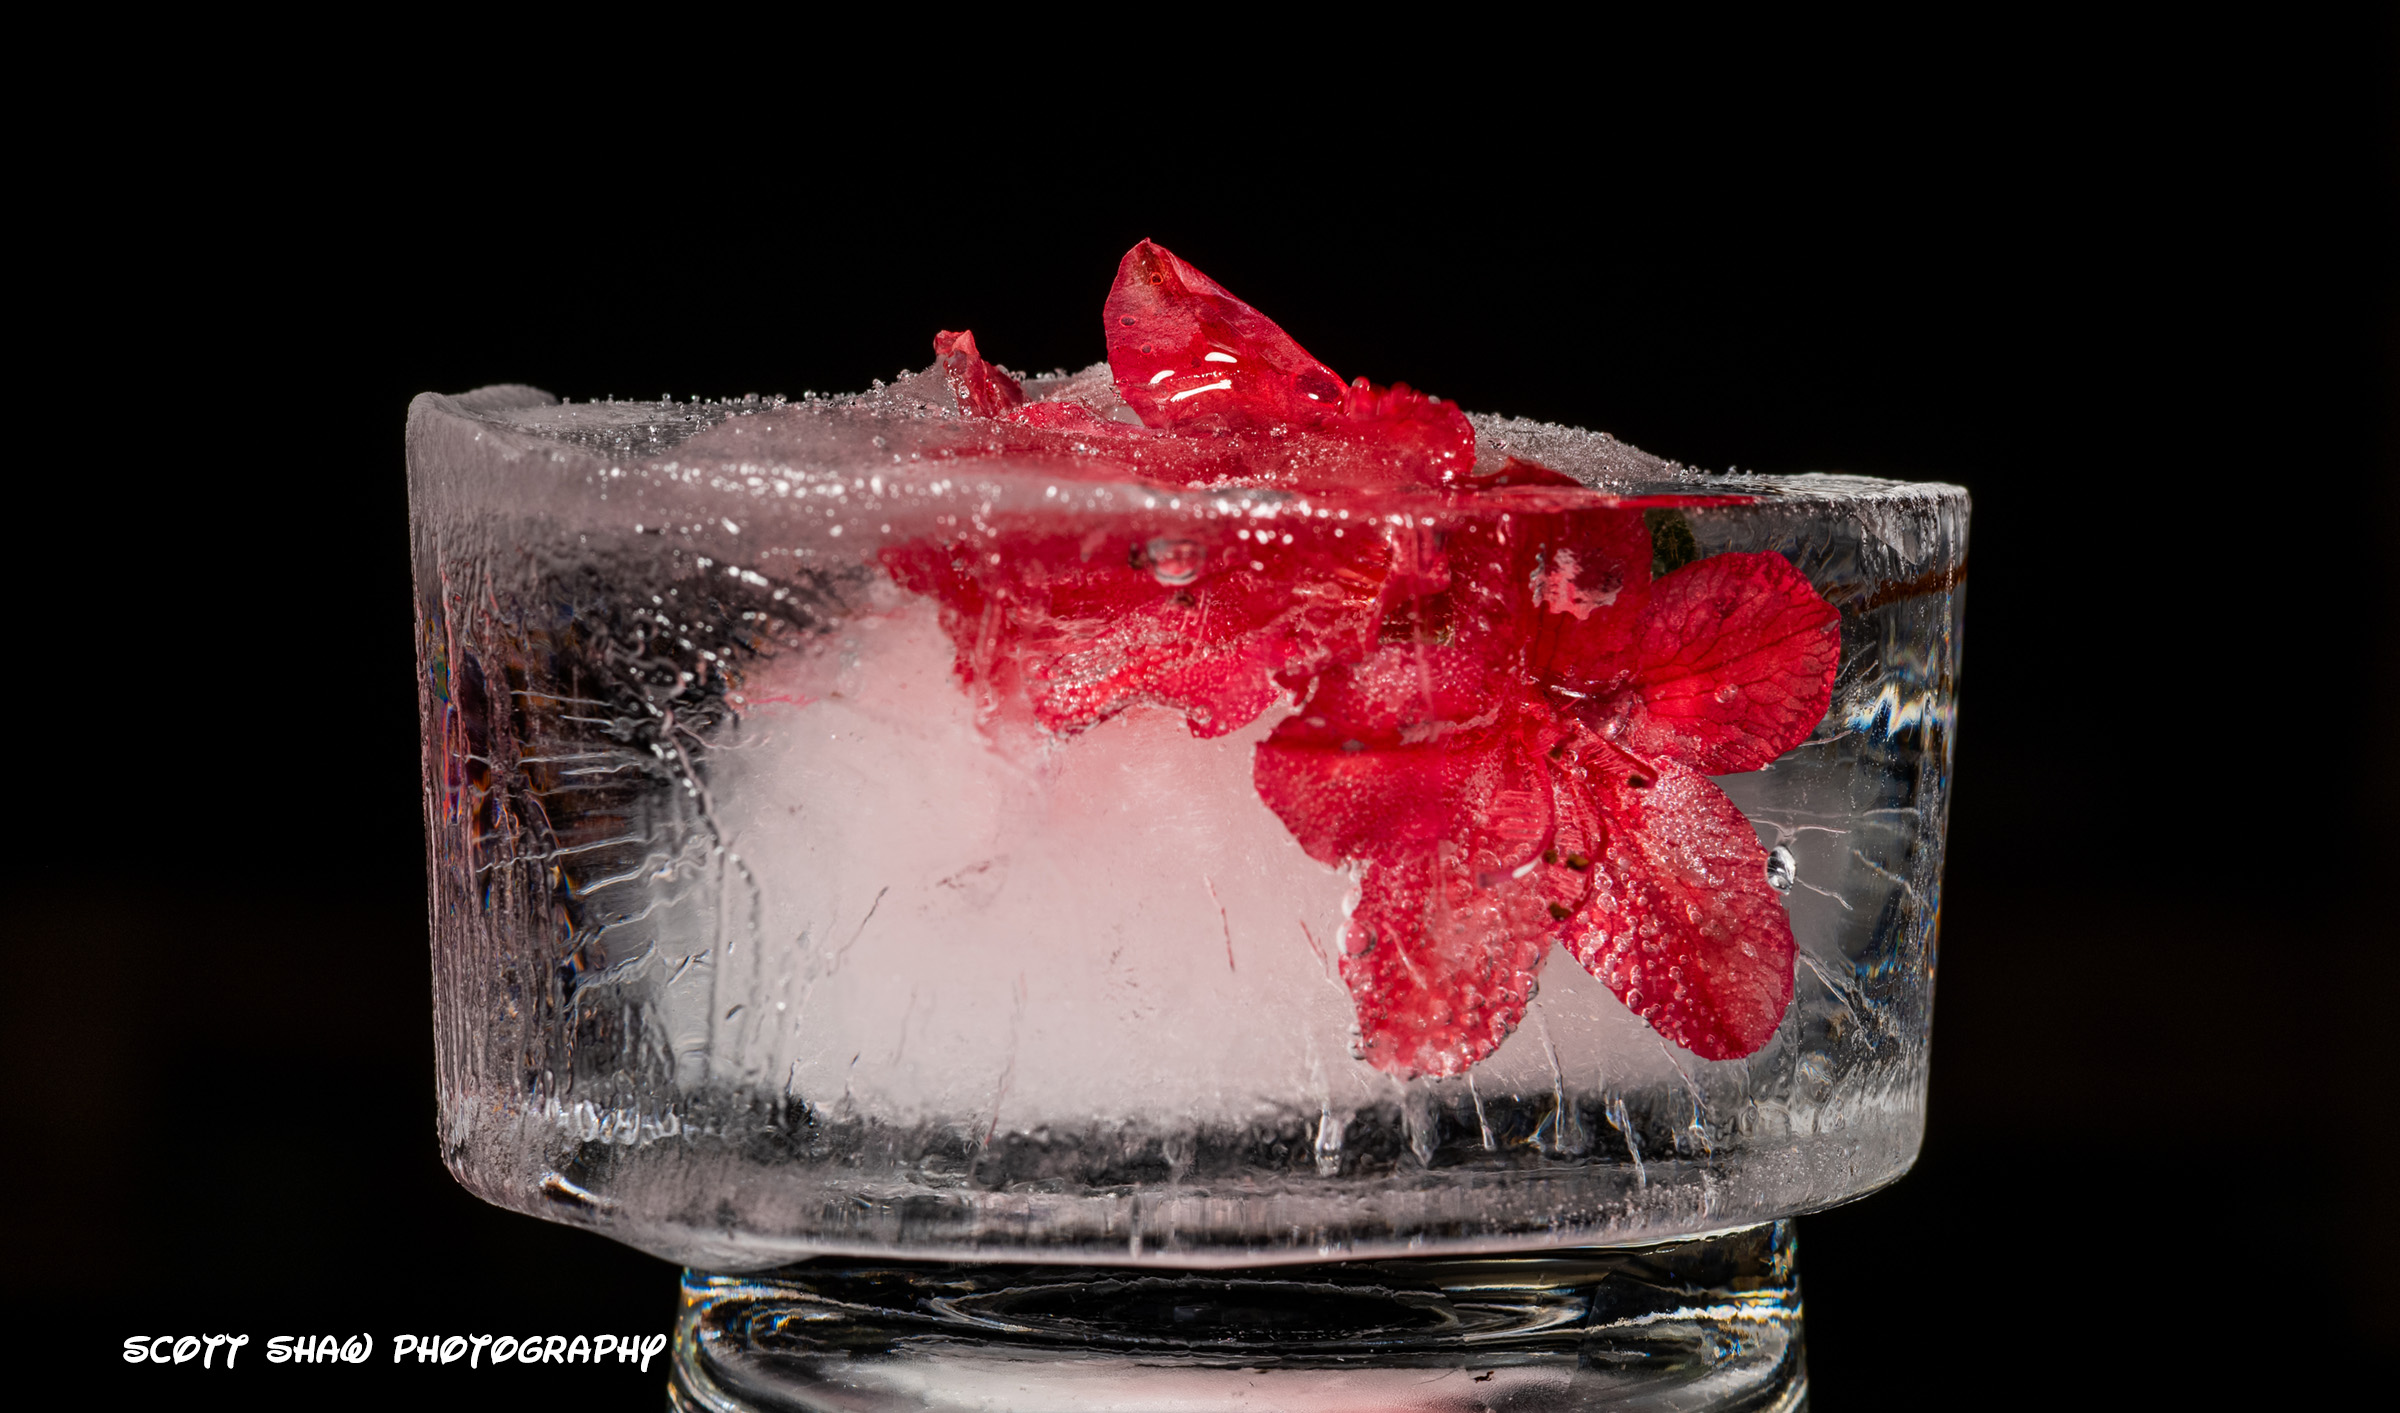
One day I read an article about photographing flower blossoms in ice. Later that day I walked outside and plucked some blossoms off the azalea in my yard. After several days in the freezer, it was ready for my garage studio.
I especially like the ice crystals along the top back edge of the ice. The cracks and bubbles in the ice add visual interest. I placed the ice block on top of an upturned glass. In the final image this almost looks like a reflection of the ice block.
One word of caution: work fast! Those nice ice crystals start melting after a few minutes. The bloom sticking out of the top starts wilting after 15 minutes or so. Other than that, this is a nice project to save for a rainy day.
Garage Photography
Nikon D810, 15.0 sec, f/20, 90mm, ISO 200
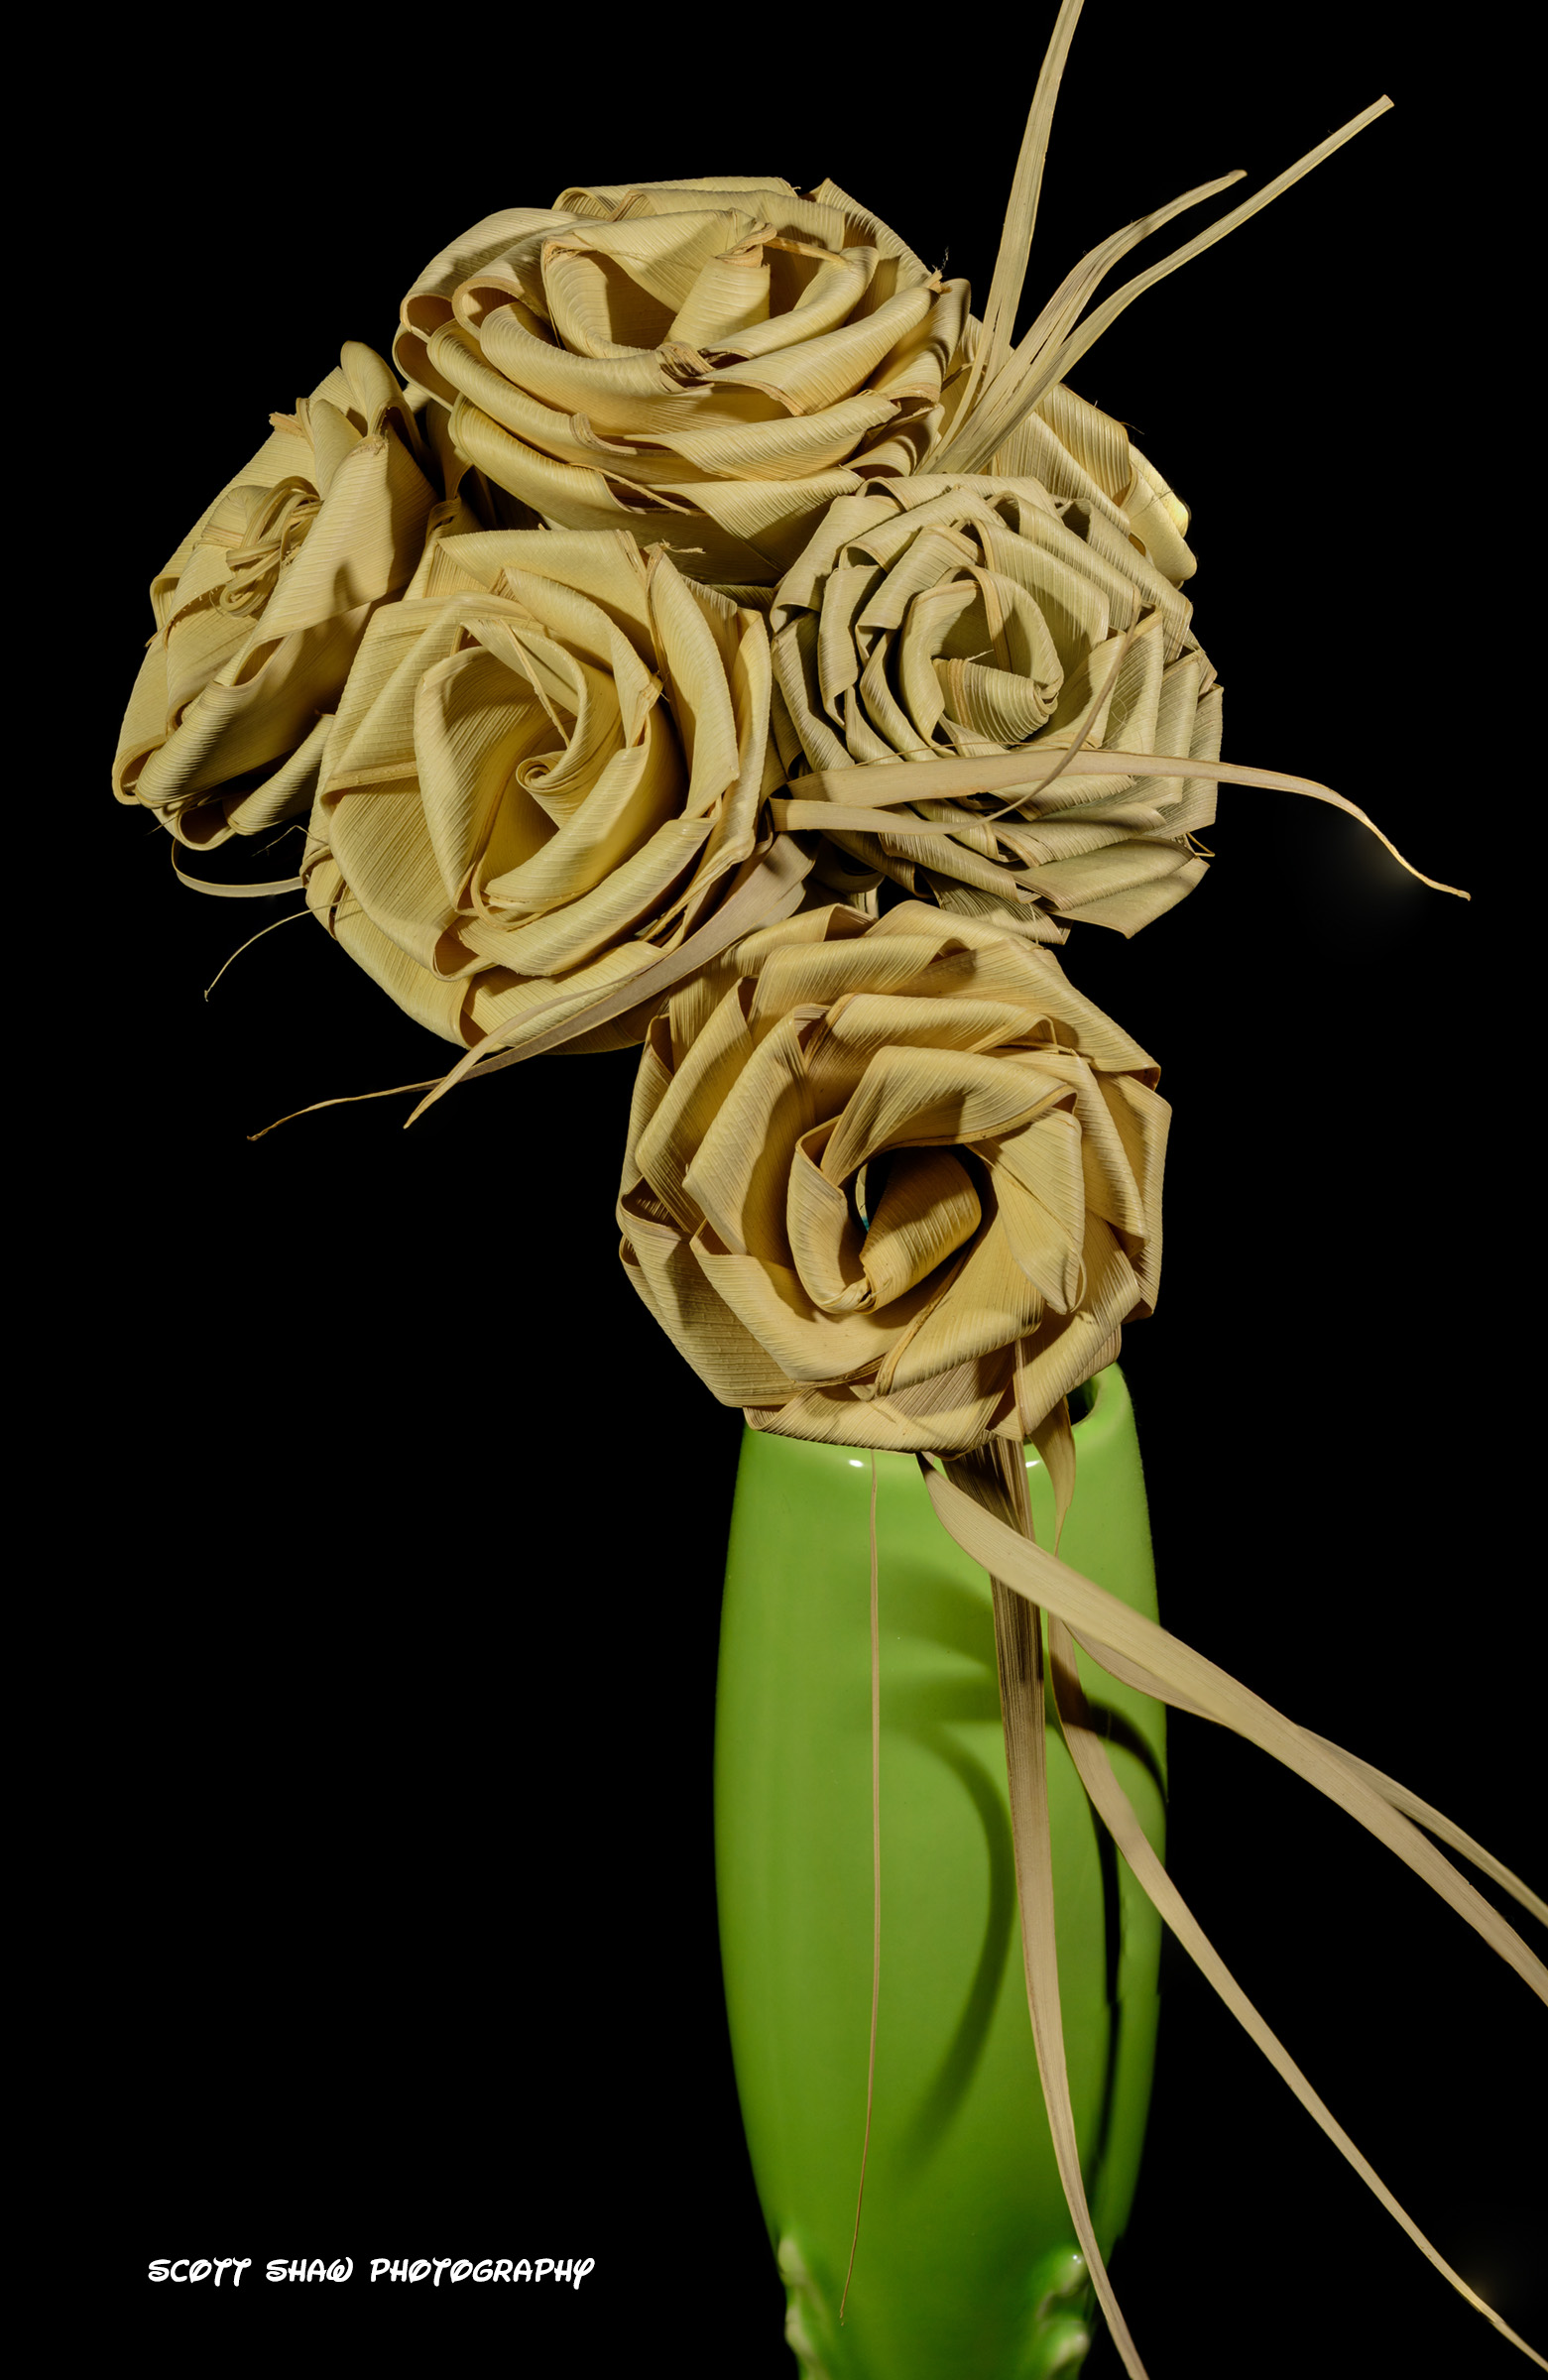
My wife picked up this sea grass bouquet during a trip to Charleston, SC. One rainy day I took this into my garage studio and broke out my 90mm macro lens. Because of the shallow depth of field associated with macro lenses, and the depth from front to back of the bouquet, I had to take multiple images focused on different parts of the bouquet. To control the focus points, I used my Really Right Stuff macro rail (yikes! I bought mine years ago and did not spend this much!)
During post processing I focus stacked the dozens of images into a single image. Actually, there were so many images I had to stack them into four different images, and then focus stack those four images. After focus stacking, the entire image is in sharp focus forth very back to the strands sticking out the front.
Garage Photography

Mickey Mouse Bokeh (click to enlarge)
A while back I saw a blog post about Mickey Mouse shaped bokeh. I made a cut-out for my lens and used this technique during a trip to Disneyworld. When I got home I put the cut-out away and forgot about it.
Looking for a weekend garage photography project, I noticed one of my wife’s Disney christmas ornaments. I took a few images with a string of Christmas lights in the background. The image looked okay, but the blue light bokeh in the background did not add much to the image. I then remembered my Mickey Mouse bokeh cut-out and put that over my lens.
I used the set up shown in this blog post to capture this image. In that post you can see the blue Christmas lights on a black background. I used a focal length of 200mm which compressed the distance between the ornament and the Christmas lights in the image above. I used two Pringles can snoots to light the ornament, one on each side above and behind the camera shining down on the ornament.
I spent some time trying to arrange the Christmas lights between images to get rid of blank spots. I could never get the background lights quite right so I solved my problem during post-processing. The image contains several bokeh mouse ears surrounded by black. It was easy to use Photoshop’s Magic Wand Tool to select one mouse ear bokeh, copy it, then paste it into a blank spot. I copied several different colors of mouse ear bokeh and solved my problem.
This was just a photography lighting exercise project, but I did learn some things. One lesson I should have taken from flower macro photography is to always pick a perfect flower. The same goes for Christmas ornaments. Notice that the stars on the right ear are pretty crisp. The stars on the left ear are not as crisp. I spent some time trying to perfect my focus and just could not get the left ear sharp. I looked very closely at the left ear and noticed the blur was a production issue and not a focus issue.
Next time we go to Disneyworld I will make sure everything my wife buys is macro-photography ready. Just in case…
Disney Christmas Ornament Bokeh: My Garage
