

Wright Brothers Monument (click to enlarge)
Above is an original image of a small part of the Wright Brothers Monument in Kill Devil Hills, NC. A quick glance shows that there is just so much wrong with this image. First off, note all of the “dead” space above the text that reads Wilbur. The empty stones and sky add nothing to the image. Also note what appears to be three air vents in the stonework, these just distract the eye. Finally, notice the cut off text along the bottom edge.
Below is the finished image. Cropping the image got rid of one air vent, the dead space above Wilbur, and the cut off text at the bottom. Photoshop’s Content Aware fill feature got rid of the two remaining air vents. The middle air vent in the original image was particularly troublesome. I just could not get that seam between the stones to look right after filling in the air vent. I ended up copying the seam just to the left and using that over the top edge of the air vent (this is the horizontalish seam intersecting the top edge of the image between the I and L in Wilbur).
Another adjustment was the selective use of black and white. I selected just the monument and opened the image in Nik Software’s Silver Efex Pro 2. I converted the monument to black and white and saved the image back to Photoshop. I was looking for that Wizard of Oz transition from black and white to color. Once the Wright Brothers flew their first flight, it was like they touched down in a completely new world, just like Dorothy landing on the Wicked Witch.
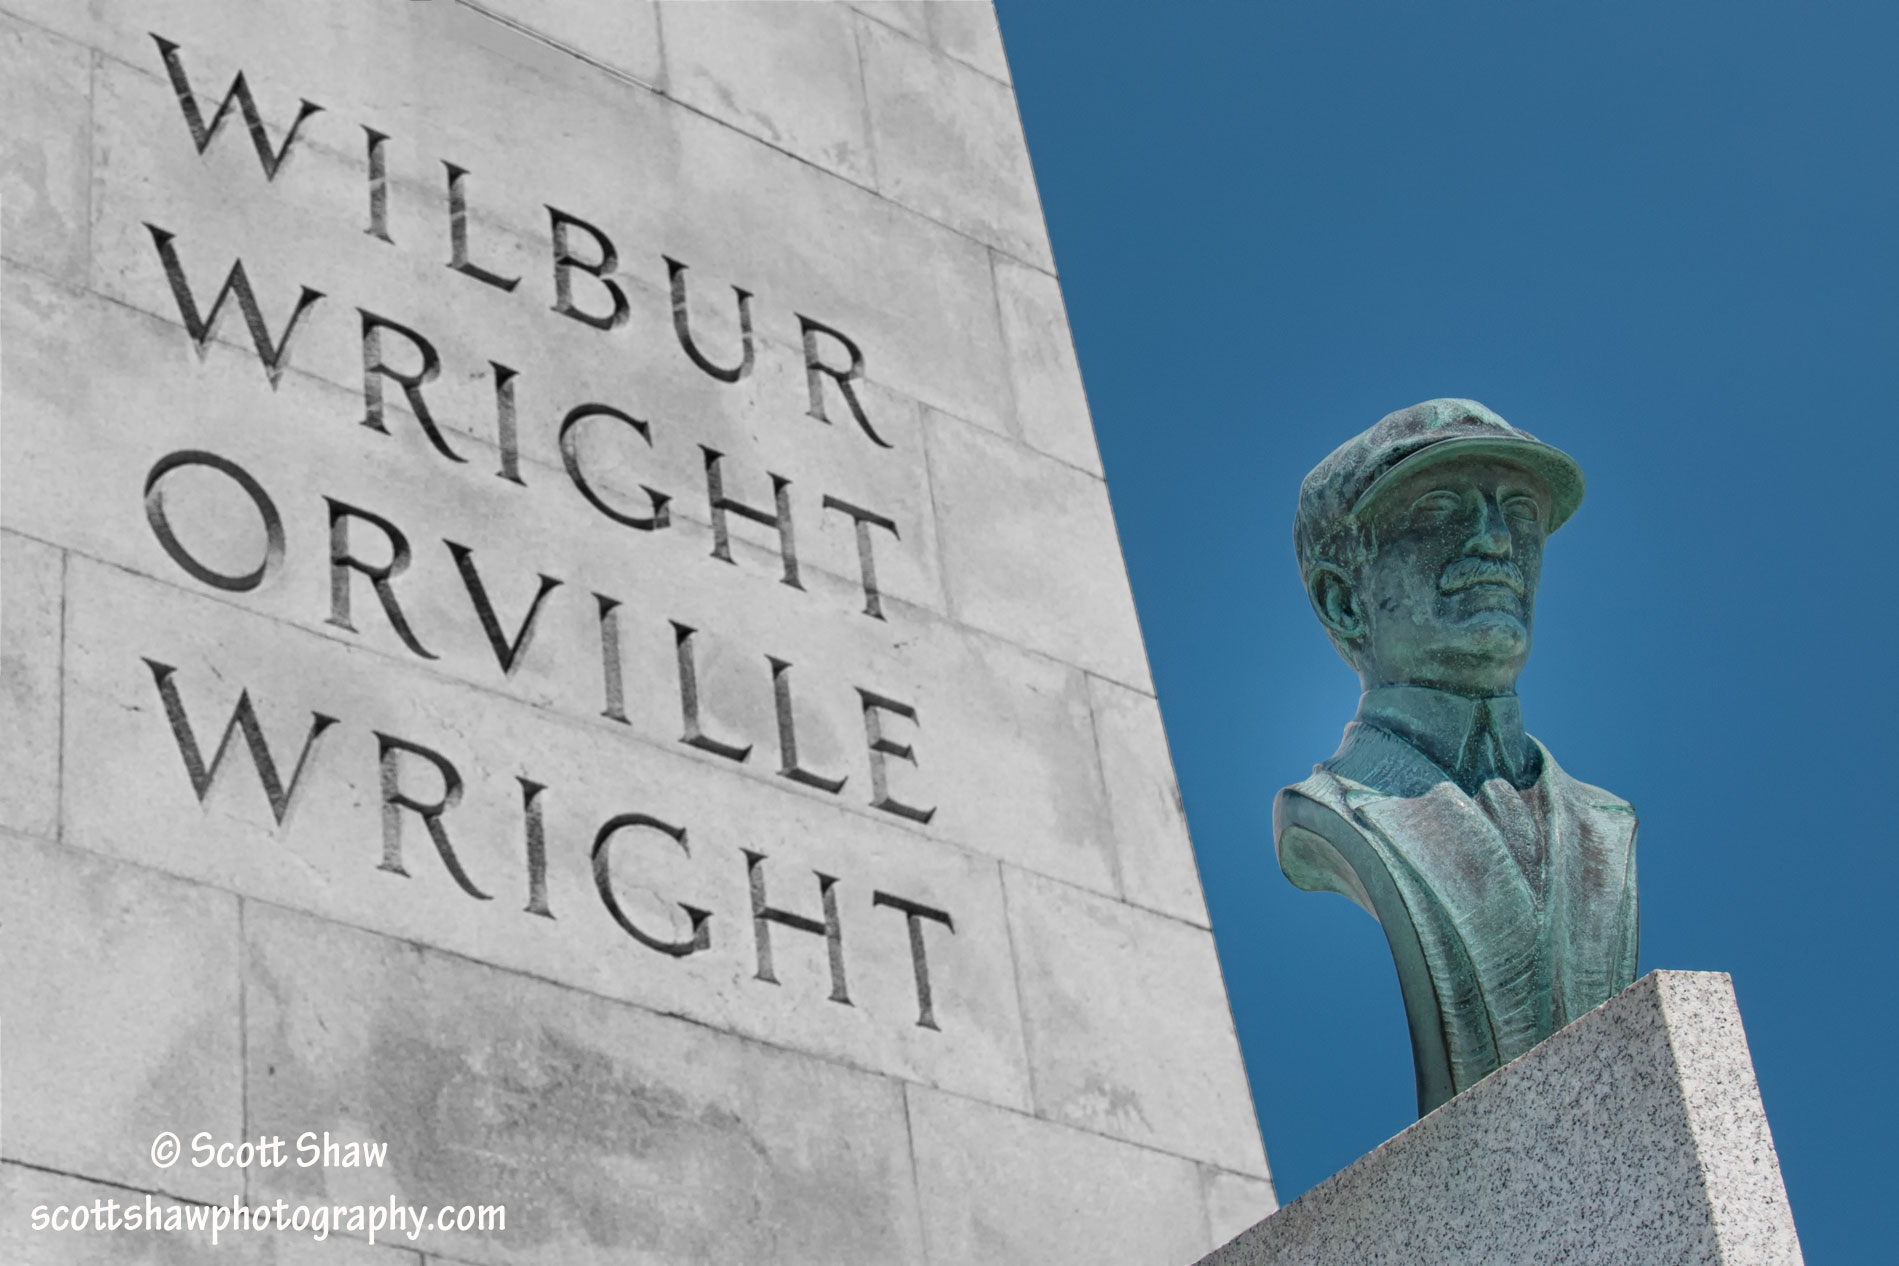
Wright Brothers Monument (click to enlarge)
Now, there are two things that I would change about the modified image. First, some clouds would make that plain blue sky much more interesting. Having no control over the weather, I was stuck with with the image I had. Second, notice that in the original image the bust is in deep shadows. My wife recently had hip surgery, so she was not up to climbing the hill to the monument. I went up the hill with only my camera and tripod for a quick look. I wish I had also brought my Cowboy Studios reflector so that I could have lit up the bust. I was able to lighten it somewhat in Photoshop, but using the reflector in the original image would be so much better.
Lesson learned, always carry all tools of the trade, even if you are just planning to take a quick look.
Location: N36 00 50.90 W075 40 02.43

Hay Bales With and Without Telephone Poles
So how great is Photoshops Content-Aware fill feature? (Edit -> Fill -> Content-Aware). The two images above are identical, except for the use of Content-Aware on the right image. Notice the three telephone poles in the left image. On the right image they have magically disappeared. Total time less than 1 minute.
I took the above image somewhere in the Tuscan countryside. My wife was driving and pulled over to the side of the road and told me to get out and shoot this scenic vista. I told her the telephone poles would ruin the image but she insisted. Once I started working with the images I was very impressed with the way Photoshop makes things “go away”.
Some might say that it is cheating to delete such major parts of an image. Obviously I disagree. At the last competition at the Northern Virginia Photographic Society the judge commented numerous times that the photographer should have deleted some distracting item in their image. I guess I am not alone.
I ended up with a very nice panorama after stitching together several images from this spot. That is a story for the next post.
